Principal and Administrator can easily one or more new students.
Step 1: Go the Admin tab and click on Add Students

Step 2: Key in the student BC No. and Student Name.
Step 1: Go the Admin tab and click on Add Students
Step 2: Key in the student BC No. and Student Name.
- Choose the Gender, and Choose the Start Date (The day student is starting school)
- Click on Select the Class:
The classes will be shown following a list of class levels:
- Or search for a specific class name on the Search bar "Search class here":
- Click on Submit if you are done:
If a notification pop-up when key in the Studen BC No., it means that the BC number belongs to an existing account on LittleLives

1. Double-check the typo and change accordingly.
2. The child already has an account on LittleLives registered by the previous school. Admin can confirm and proceed "Continue" normally.
Add multiple students
1. If you have more than one Student, click + Add More
2. Made an error and would like to remove one layer, simply click - Remove
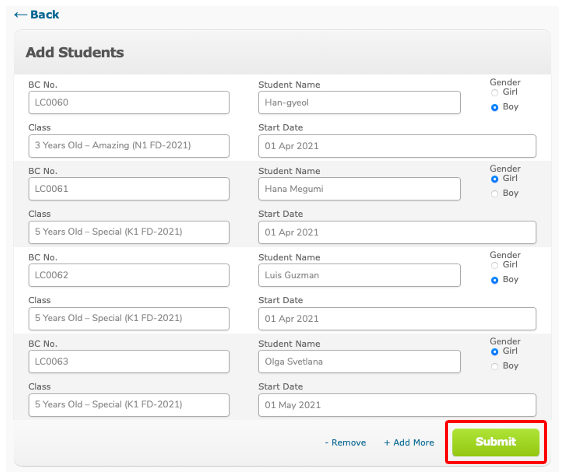
2. Made an error and would like to remove one layer, simply click - Remove
Step 3: Remember to click Submit to complete the action of adding students.
Note:
1. Check and ensure that you have entered the correct BC number with no spaces at the front or back.
2. If you do not have the BC number, input Parent's IC instead.
3. Do not put a fake BC such as TBC or T1234567A
Step 3: Remember to click Submit to complete the action of adding students.
Add new students to Future classes
At the Admin page, please choose the Currently viewing year to a future year.
Add new classes to this future year. (How do I add a new class?)
Add Students: The list of future classes in this year will appear instead of classes in the current year.
Then, you can switch back and forth between the years by changing the Currently viewing year as needed (How to change Currently viewing year to past or future year?)